Customize Hexo Blogroll Page
Blogroll is natively supported in NexT theme. All links will be shown in the sidebar. However, as your links increases, the sidebar length increases as well. It makes the page lengthy and distracting. Therefore, we consider creating a dedicated blogroll page.
After searching, most of the existing approaches need to modify NexT source code (theme swig template files). The implementation is a little bit complicated while breaks the theme's integrity. When you update the theme later, you will need to manually merge or rebase the master to your code.
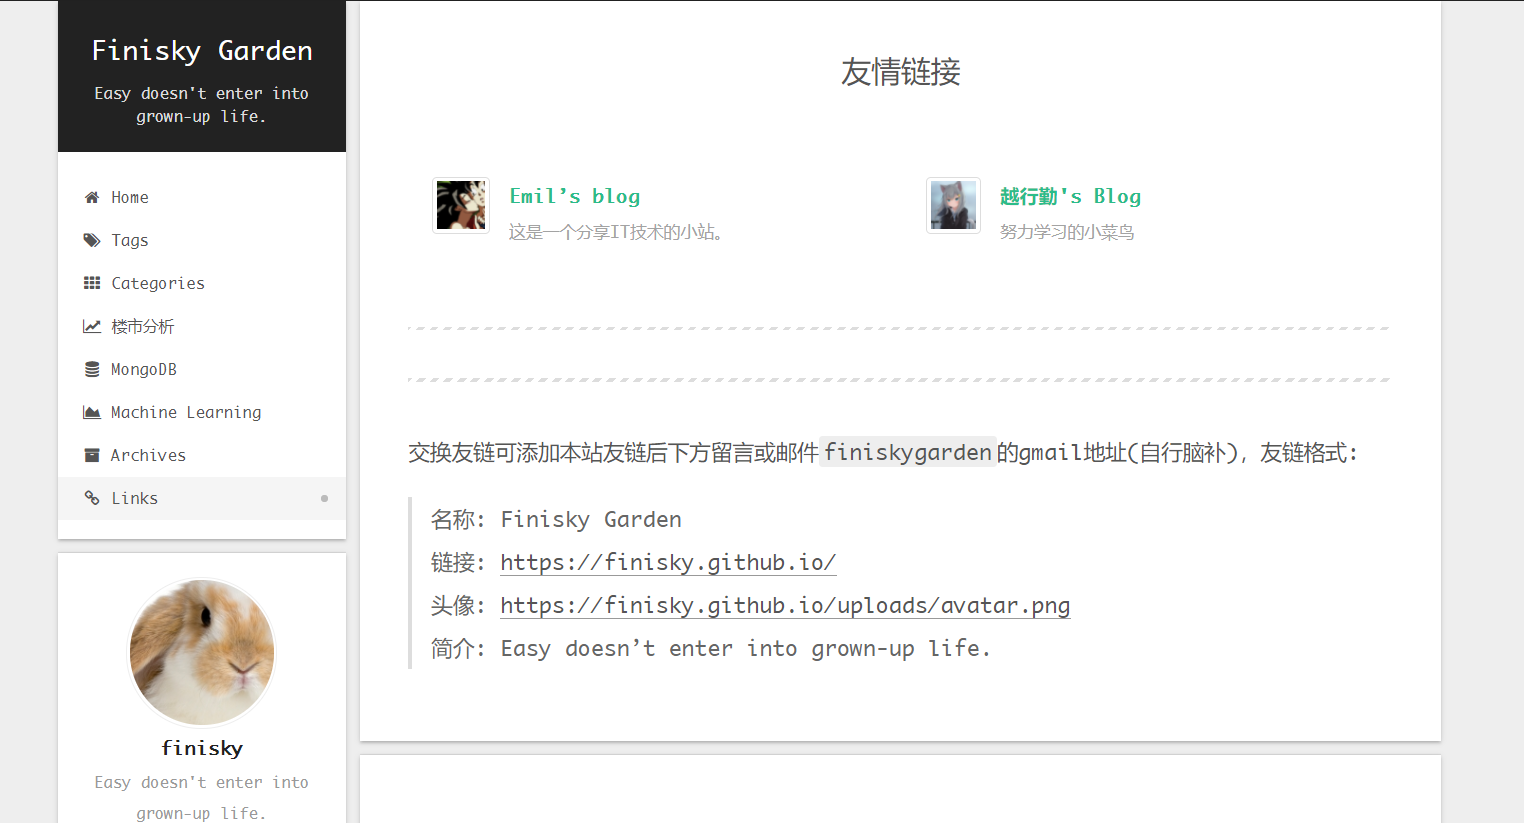
Actually, there is a straightforward solution. Consider that we can embed html to markdown, creating a new post with customized css/html would be enough. :-)
Potential solutions
Let's discuss the following three solutions:
- Use native NexT blogroll config
- Customize a new blogroll template and change the code
- Creating a customized post
The first solution is easy but not scalable. The second solution is a little bit hard to implement and makes upgrading the theme harder. The final solution is easy to implement and maintain.
Customize Hexo blogroll page
Create a post
Create a new folder links in source, then
create a file named index.md:
---
title: Links
date: 2021-06-16 00:34:27
---

<div class="post-body">
   <div id="links">
      <style>
         .links-content{
         margin-top:1rem;
         }
         .link-navigation::after {
         content: " ";
         display: block;
         clear: both;
         }
         .card {
         width: 45%;
         font-size: 1rem;
         padding: 10px 20px;
         border-radius: 4px;
         transition-duration: 0.15s;
         margin-bottom: 1rem;
         display:flex;
         }
         .card:nth-child(odd) {
         float: left;
         }
         .card:nth-child(even) {
         float: right;
         }
         .card:hover {
         transform: scale(1.1);
         box-shadow: 0 2px 6px 0 rgba(0, 0, 0, 0.12), 0 0 6px 0 rgba(0, 0, 0, 0.04);
         }
         .card a {
         border:none;
         }
         .card .ava {
         width: 3rem!important;
         height: 3rem!important;
         margin:0!important;
         margin-right: 1em!important;
         border-radius:4px;
         }
         .card .card-header {
         font-style: italic;
         overflow: hidden;
         width: 100%;
         }
         .card .card-header a {
         font-style: normal;
         color: #2bbc8a;
         font-weight: bold;
         text-decoration: none;
         }
         .card .card-header a:hover {
         color: #d480aa;
         text-decoration: none;
         }
         .card .card-header .info {
         font-style:normal;
         color:#a3a3a3;
         font-size:14px;
         min-width: 0;
         overflow: hidden;
         white-space: nowrap;
         }
      </style>
      <div class="links-content">
         <div class="link-navigation">
            <div class="card">
               <img class="ava" src="https://cdn.jsdelivr.net/gh/hvnobug/assets/common/avatar.png" />
               <div class="card-header">
                  <div>
                     <a href="https://blog.hvnobug.com/">Emil’s blog</a>
                  </div>
                  <div class="info">这是一个分享IT技术的小站。</div>
               </div>
            </div>
            <div class="card">
               <img class="ava" src="https://yingwiki.top/avatar" />
               <div class="card-header">
                  <div>
                     <a href="https://yingwiki.top">越行勤's Blog</a>
                  </div>
                  <div class="info">努力学习的小菜鸟</div>
               </div>
            </div>
         </div>
      </div>
   </div>
</div><div class="card">
<img class="ava" src="{avatarurl}" />
<div class="card-header">
<div>
<a href="{link}">{name}</a>
</div>
<div class="info">{description}</div>
</div>
</div>hexo g,
links/index.html will be generated.
Add a menu item links
Open the NexT configuration file _config.yml, find the
section menu and add a new line:
...
menu:
  tags: /tags/ || tags
  categories: /categories/ || th
...
  Links: /links/ || link
...
Done! Run hexo clean and hexo g to check
the result: 